


 Photography: Jaharn Quinn and Aimee Dodge
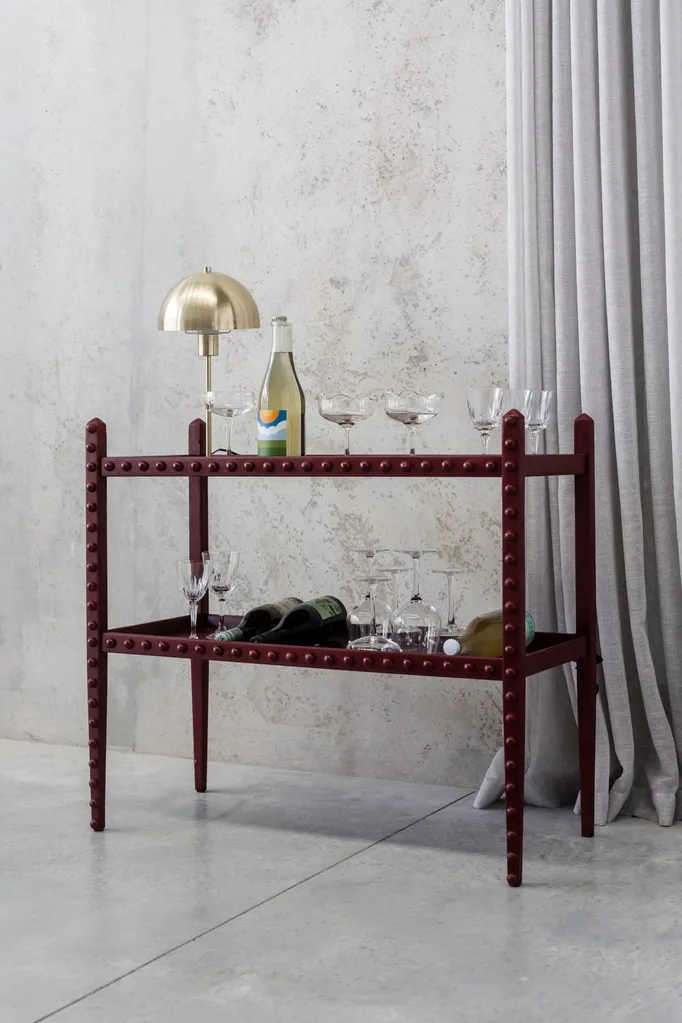
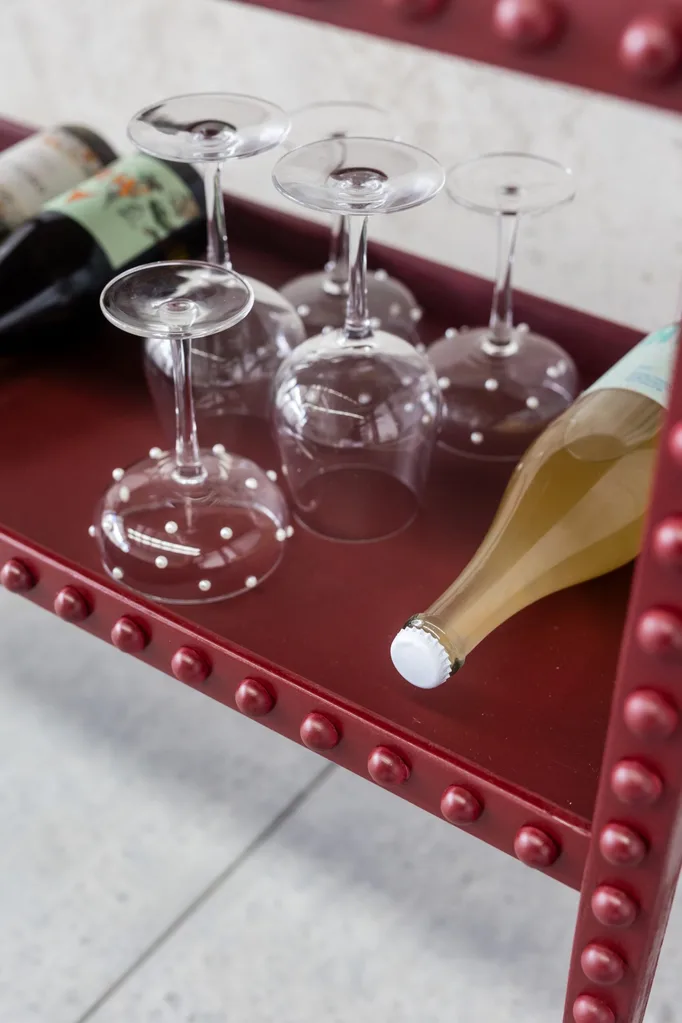
I love entertaining, and a bar cart is convenient for serving drinks to guests when they come over. When styled with bottles and vintage glassware, they look gorgeous in any space. When I stumbled across this wooden bar cart I knew it would be perfect for a simple upcycling idea with lots of wow factor! I also intentionally chose to use a deep red paint colour, knowing it would look beautiful in a variety of settings. This use of red is known as the ‘unexpected red theory’, a term coined by Brooklyn-based interior designer Taylor Migliazzo Simon. Simon suggests that ‘adding anything that’s red to a room where it doesn’t match at all will still automatically make it look better’. The theory suggests that red is as versatile as a neutral colour because it can work in almost any palette of colours and materials, either as an accent or complementary tone. And I 100 per cent agree with that!
Materials
- 80-grit sandpaper
- 120-grit sandpaper
- Second-hand wooden bar cart
- Wooden half beads
- Construction adhesive
- Spray paint
Tools
- Drop sheet (cloth)
- Orbital sander
- Microfibre cloth
Safety gear
- Protective eyewear
- Protective earplugs
- Protective face mask latex gloves
Make it your own
Make this bobbin bar cart your own by adding brass castor wheels to the bottom of the legs so you can easily wheel it from the kitchen to the living room or outdoors. Glue the wooden half beads next to each other instead of having space in between them, or use different-coloured spray paint. Perhaps spray paint the bar cart one colour and the wooden half beads a different colour before gluing them on. You can use water-based acrylic paint instead of spray paint if you like but, from experience, it’s a lot more finicky to paint the wooden half beads.

How to
1.
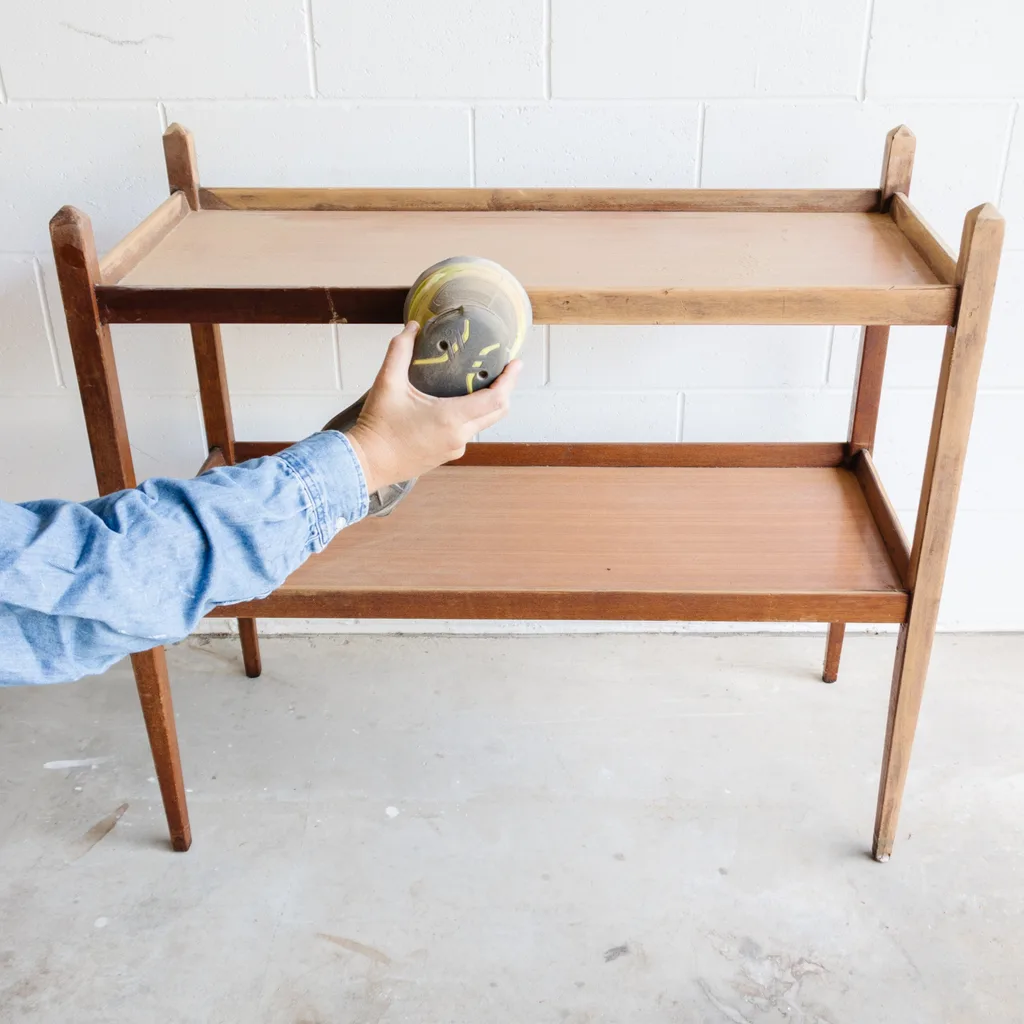
Cover the floor with a drop sheet. Use an orbital sander with 80-grit sandpaper, followed by 120‑grit sandpaper, to sand the bar cart. Remove any dust using a damp microfibre cloth. Set aside to thoroughly air dry.
2.
Lay the bar cart on the ground. Working in sections, place wooden half beads together along the front in a tight line. Carefully remove every second wooden half bead and glue the remaining half beads onto the timber with construction adhesive. Repeat until the front of the bar cart is covered in wooden half beads. Set aside to allow the glue to dry for an hour.


3.
Apply up to four very light coats of spray paint to the bar cart, allowing each coat to dry before applying the next. Set aside to dry completely.

TIP
Don’t position the spray paint can too close to the bar cart when painting or the paint may drip down the cart. If this happens, quickly dab it off lightly using a dry microfibre cloth or a baby wipe and reapply the spray paint. Always follow the instructions on the spray paint can. Multiple coats of light spray paint application is always best.
This is an edited extract from Dream Home DIY by Jaharn Quinn (Hardie Grant Books), RRP AU$45. Available now.
Related stories
Native ad body.

Native ad body.
The secret to making a house your Dream Home

Native ad body.

.jpg?resize=380%2C285)